Tag: Visual edit |
GotenSakurauchi (talk | contribs) m (Reverted edits by Raymond Hitchens (talk) to last revision by 169.150.198.72) Tag: Rollback |
||
| (21 intermediate revisions by 14 users not shown) | |||
| Line 1: | Line 1: | ||
{|align="center" |
{|align="center" |
||
| − | |{{Quote|Baby is born. Baby is killed. Baby is dinner. (Babies are good source of Prime Meat)...|Drake|Baby |
+ | |{{Quote|Baby is born. Baby is killed. Baby is dinner. (Babies are good source of Prime Meat)...|Drake|Baby Creatures}} |
|} |
|} |
||
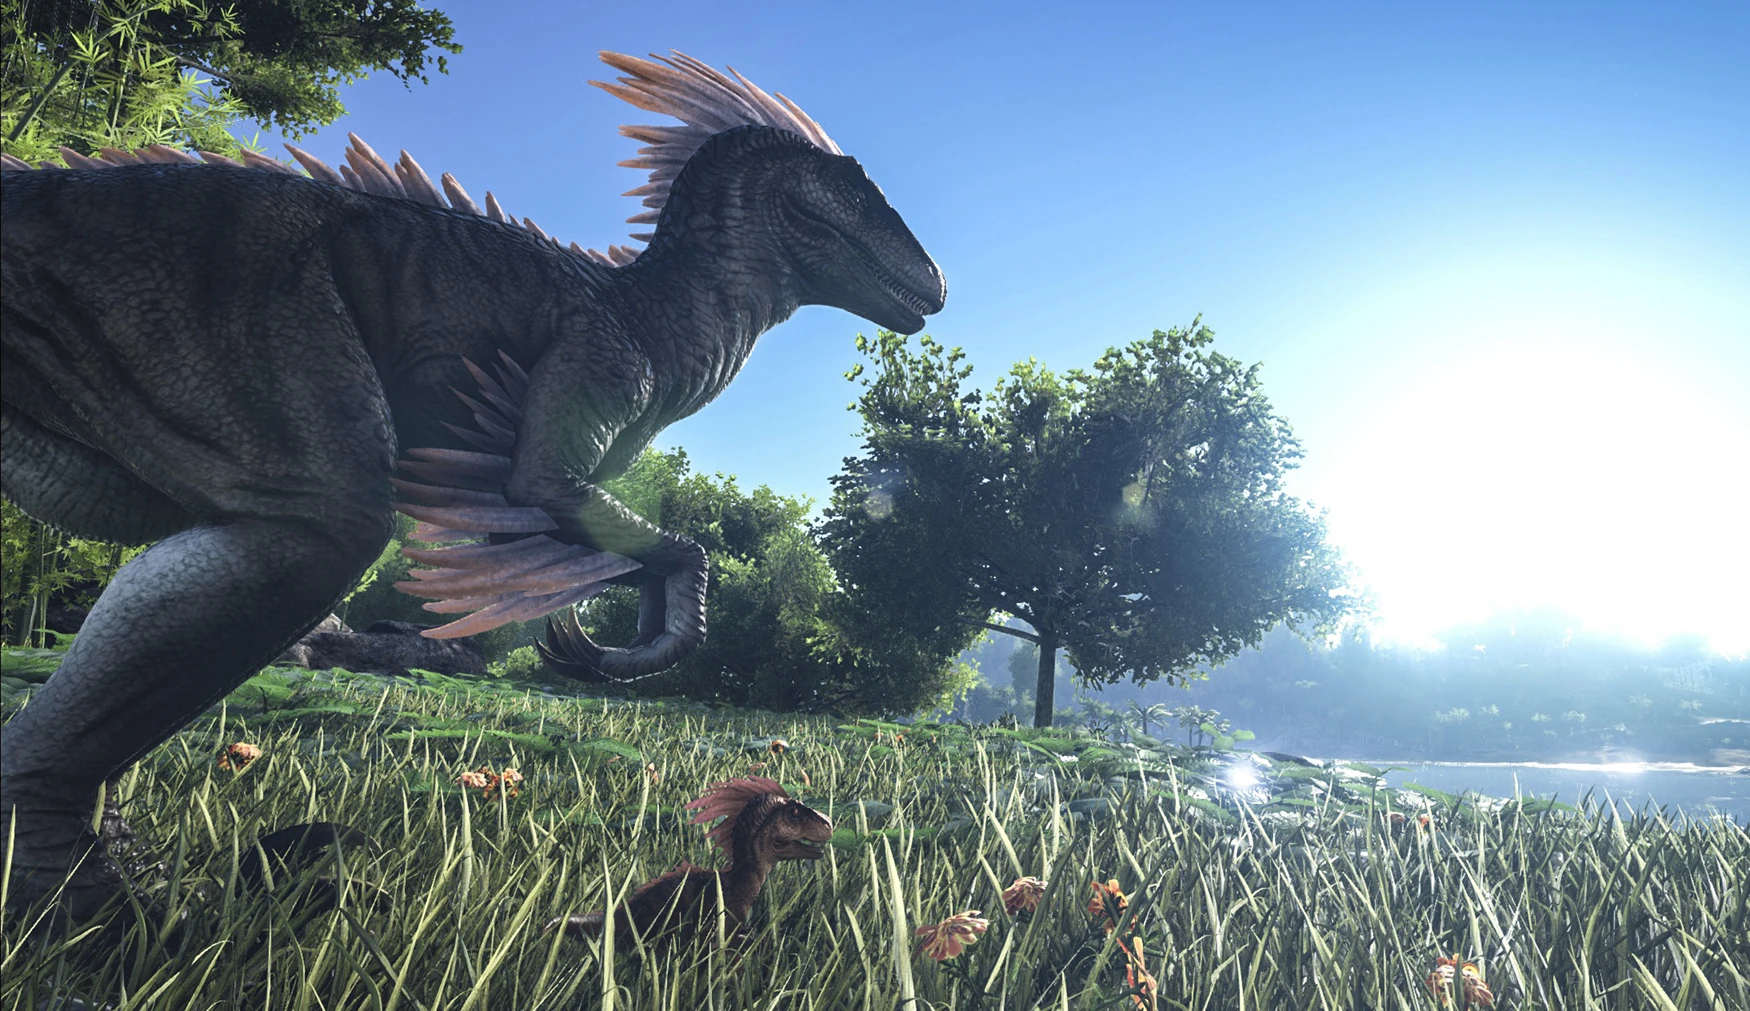
[[File:ARKBabyDinos.jpg|400px|thumb|right|A Raptor and his offspring]] |
[[File:ARKBabyDinos.jpg|400px|thumb|right|A Raptor and his offspring]] |
||
| − | '''Breeding''' is a feature of ''[[ARK: Survival Evolved]]'' that allows players to breed improved creatures through [[Eggs]] with non-mammals and gestation with mammals. Eggs do not have an owner, so it's possible to steal eggs laid by other survivors' |
+ | '''Breeding''' is a feature of ''[[ARK: Survival Evolved]]'' that allows players to breed improved creatures through [[Eggs]] with non-mammals and gestation with mammals. Eggs do not have an owner, so it's possible to steal eggs laid by other survivors' creatures. |
Newborn creatures are simply claimed (imprinted on) and do not require the usual [[taming]] processes associated with wild creatures. Anyone can claim a newborn. This must be done promptly, along with feeding it, as babies can die quickly from hunger. |
Newborn creatures are simply claimed (imprinted on) and do not require the usual [[taming]] processes associated with wild creatures. Anyone can claim a newborn. This must be done promptly, along with feeding it, as babies can die quickly from hunger. |
||
| + | |||
| + | {{tocright}} |
||
==Breeding Mechanics== |
==Breeding Mechanics== |
||
===Preparing Mating=== |
===Preparing Mating=== |
||
| − | The first step of breeding is having two opposite sex creatures of the same species for mating. Original, Tek, Aberrant and |
+ | The first step of breeding is having two opposite sex creatures of the same species for mating. Original, Tek, Aberrant, X, and R variants of creatures count as '''separate''' species, and as such, '''cannot''' be cross-bred. They must be bred with their own variant. Most creatures can be bred; those few that cannot are listed at the bottom of this article. See [[#Sterile_Creatures|Sterile Creatures]] for more information. |
| − | Always be prepared for having more than one baby |
+ | Always be prepared for having more than one baby to be born upon incubation/gestation completion. There is a 10% chance of twins, and a 2% chance of triplets.<ref>[http://steamcommunity.com/app/346110/discussions/0/594820656447032287/ Patch notes, v220]</ref> |
It has been confirmed that there is no creature in the game capable of affecting chances of mutations, twins and triplets.<ref>[https://twitter.com/ComplexMinded/status/1235283589597626369 ComplexMinded's tweet, dated Mar 4, 2020]</ref> |
It has been confirmed that there is no creature in the game capable of affecting chances of mutations, twins and triplets.<ref>[https://twitter.com/ComplexMinded/status/1235283589597626369 ComplexMinded's tweet, dated Mar 4, 2020]</ref> |
||
====Mating Requirements==== |
====Mating Requirements==== |
||
| − | For creatures to successfully mate, |
+ | For creatures to successfully mate, they must be: |
| + | * of same species |
||
| + | * of opposite sex (one male and one female) |
||
* within mating range of each other |
* within mating range of each other |
||
* wandering or set to mate (''Enable Wandering'' or ''Enable Mating'' must be enabled on both creatures) |
* wandering or set to mate (''Enable Wandering'' or ''Enable Mating'' must be enabled on both creatures) |
||
| Line 24: | Line 28: | ||
* not mounted |
* not mounted |
||
* not spayed/neutered |
* not spayed/neutered |
||
| − | * not having a mating cooldown (once mated females have a mating cooldown interval before they can mate again, the cooldown can also be triggered when |
+ | * not having a mating cooldown (once mated females have a mating cooldown interval before they can mate again, the cooldown can also be triggered when transferring the creature between Arks) |
| − | ====Mating Range==== |
+ | ====Mating Range While Wandering==== |
| − | + | If using the ''Enable Wandering'' method to allow for mating, then steps need to be taken to maintain the mating range, which varies between species and is loosely based on the size of the adult creature. If the mating pair wander outside the mating range, then mating is stopped and mating progress is reset. |
|
| + | Building a pen of a suitably small size to keep the wandering creatures within mating range of each other is one common approach. |
||
| ⚫ | |||
| ⚫ | You can also use the "[[Whistle]] Stop (All)" command ({{key|U}} on PC). This halts all creatures within the area to stop moving, even ones that are enabled to wander. It's best to use the whistle every time the creature starts to move again, or to prevent the creatures from ever moving, whistle constantly. While this method doesn't need a pen, it does need you or a tribe member to stay there and constantly whistle. This may be more helpful if one survivor is constantly whistling not to move, and another survivor enables the creatures nearby to wander. In this way, you can achieve mass breeding in an area without ever building a pen, or moving creatures. |
||
| ⚫ | |||
| ⚫ | |||
| ⚫ | |||
| + | |||
| ⚫ | |||
| + | |||
| + | If you do not want to build a pen, whistle or use a leash; then you can simply use ''enable mating'' instead, this will make the creatures stand still and then they will start to mate. |
||
===Mating=== |
===Mating=== |
||
| Line 40: | Line 48: | ||
Once the mating bar is completed, non-mammalian females drop a single [[Eggs|fertilized egg]] , and mammalian females start gestating. |
Once the mating bar is completed, non-mammalian females drop a single [[Eggs|fertilized egg]] , and mammalian females start gestating. |
||
| − | If there are too many tamed |
+ | If there are too many tamed creatures in the server or in the tribe, the pair will refuse to mate until there is a free spot. |
====Special Conditions of Mating==== |
====Special Conditions of Mating==== |
||
| − | Some of the |
+ | Some of the creatures will only mate when certain conditions are given. |
*{{ItemLink|Royal Griffin}} - will only mate with the other gender with similar surname. |
*{{ItemLink|Royal Griffin}} - will only mate with the other gender with similar surname. |
||
*{{ItemLink|Ferox}} - will only mate when the female is at least 95%+ addiction as a small creature. |
*{{ItemLink|Ferox}} - will only mate when the female is at least 95%+ addiction as a small creature. |
||
| Line 52: | Line 60: | ||
====Mating Wait Interval==== |
====Mating Wait Interval==== |
||
| − | Females cannot mate again until a mating wait interval has passed ([[Cryopod (Extinction)|Cryofreezing]] them will still continue the mating interval cooldown). This interval is indicated on their HUD |
+ | Females cannot mate again until a mating wait interval has passed ([[Cryopod (Extinction)|Cryofreezing]] them will still continue the mating interval cooldown). This interval is indicated on their HUD. |
| + | |||
| + | The mating interval starts after the creature has laid the egg or gestation has completed. The mating interval is also started for female creatures that are transferred between servers. Males can mate at any time. |
||
| + | |||
===Incubation=== |
===Incubation=== |
||
: ''Main article: [[Incubation]]'' |
: ''Main article: [[Incubation]]'' |
||
| − | The fertilized egg itself only begins [[Incubation]] when dropped onto the floor/ground |
+ | The fertilized egg itself only begins [[Incubation]] when dropped onto the floor/ground or placed correctly in an {{ItemLink|Egg_Incubator_(Genesis:_Part_2)}}. When incubating, a Fertilized Egg must be kept at a certain temperature range depending on the species (this also factors in insulation). If outside of this temperature range, incubation won't make progress, and it loses "Fertilized Egg Health" over time and is destroyed if this reaches zero. This is all indicated on the HUD when looking at a Fertilized Egg, along with its parents. |
| − | You can always "pause" the incubation by picking up the egg and putting it in a {{ItemLink|Refrigerator}} |
+ | You can always "pause" the incubation by picking up the egg and putting it in a {{ItemLink|Refrigerator}}, {{ItemLink|Preserving Bin}} or other [[Inventory]]. |
| − | The following eggs are an exception due to the nature of how it is obtained ( |
+ | The following eggs are an exception due to the nature of how it is obtained (no health loss in inadequate temperature area): |
| − | {{ItemList|noDlcIcon=1|Wyvern Egg ( |
+ | {{ItemList|noDlcIcon=1|Crystal Wyvern Egg (Crystal Isles)|Deinonychus Egg (Valguero)|Magmasaur Egg (Genesis: Part 1)|Rock Drake Egg (Aberration)|Wyvern Egg (Scorched Earth)}} |
| − | If there are too many tamed |
+ | If there are too many tamed creatures in the server or in the tribe, the egg will continue to incubate with no timer information, but letting it hatch will not yield a baby. <!-- IS THIS CORRECT - does it not just pause the incubation timer --> |
====Managing Temperature==== |
====Managing Temperature==== |
||
| − | The best method to ensure eggs are at an appropriate temperature for incubation is through insulation. Use one or more {{ItemLink|Air Conditioner}}, {{ItemLink|Dimetrodon}}, {{ItemLink|Kairuku}} or {{ItemLink|Otter}}. Six {{ItemLink|Air Conditioner}} should work for all eggs but eight is ideal for when there is a heat/cold storm. You might need up to 14 Air Conditioners for larger eggs such as the {{ItemLink|Giganotosaurus}}, or the {{ItemLink|Wyvern}} in [[Scorched Earth]] or Ragnarok. The {{ItemLink|Rock Drake}} in [[Aberration]] requires at least 15 Air Conditioners due to its very cold incubation requirement. Whereas the {{ItemLink|Deinonychus}} from [[Valguero]] needs a rough 23 Air Conditioners in the snow because of its extreme heat required. |
+ | The best method to ensure eggs are at an appropriate temperature for incubation is through insulation. Use one or more {{ItemLink|Air Conditioner}}, {{ItemLink|Dimetrodon}}, {{ItemLink|Kairuku}} or {{ItemLink|Otter}}. Six {{ItemLink|Air Conditioner}} should work for all eggs but eight is ideal for when there is a heat/cold storm. You might need up to 14 or more Air Conditioners for larger eggs such as the {{ItemLink|Giganotosaurus}}, or the {{ItemLink|Wyvern}} in [[Scorched Earth]] or Ragnarok. The {{ItemLink|Rock Drake}} in [[Aberration]] requires at least 15 Air Conditioners due to its very cold incubation requirement. Whereas the {{ItemLink|Deinonychus}} from [[Valguero]] needs a rough 23 Air Conditioners in the snow because of its extreme heat required. <!-- the AC counts are really not helpful since it so much depends on the surrounding temp and temp range. This varies across all maps. It feels this section was written for The Island south in the 'early days'. Delete/re-write? --> |
| + | |||
| + | With the release of [[Genesis: Part 2]], the introduction of the {{ItemLink|Egg_Incubator_(Genesis:_Part_2)}} allows for yet another way to incubate eggs. |
||
| − | Another way is to tame a handful of {{ItemLink|Dimetrodon}}. These seemingly useless finned creatures are actually one of the best sources of insulation in the entire game. The higher their melee damage, the higher their insulation bonus is; at ~1000 melee damage, it can even raise |
+ | Another way is to tame a handful of {{ItemLink|Dimetrodon}}. These seemingly useless finned creatures are actually one of the best sources of insulation in the entire game. The higher their melee damage, the higher their insulation bonus is; at ~1000 melee damage, it can even raise Wyvern eggs. The insulation effect stacks with other Dimetrodons, so if one isn't enough to do the job, try two, or three, or more. Far cheaper to maintain than the expensive air conditioners, these guys are mobile and only need meat, compared to the stationary air conditioner that also needs electricity to run. However, everything has its drawbacks: the Dimetrodon is slow and hard to transport on foot; they are hard to tame due to where they spawn and their fast torpor drop. However, it is worth the risk, especially on [[Aberration]], where {{ItemLink|Rock Drake Egg}} would normally require many air conditioners. |
At the beginning of the game, when the Air Conditioner or Dimetrodon are not yet available, use a heat source to regulate the egg's temperature. {{ItemLink|Standing Torch}}, {{ItemLink|Torch}}, {{ItemLink|Campfire}}, {{ItemLink|Industrial_Cooker|Industrial Cooker}}, and [[File:Stone Fireplace.png|frameless|20x20px]][[:en:Stone Fireplace|stone fireplace]] work well. However, they all have the downside of providing negative Heat Tolerance, making careful management necessary, or going to colder areas to make the gap between cold resistance and heat resistance bigger. You may need four or more torches, depending on the biome and the egg. |
At the beginning of the game, when the Air Conditioner or Dimetrodon are not yet available, use a heat source to regulate the egg's temperature. {{ItemLink|Standing Torch}}, {{ItemLink|Torch}}, {{ItemLink|Campfire}}, {{ItemLink|Industrial_Cooker|Industrial Cooker}}, and [[File:Stone Fireplace.png|frameless|20x20px]][[:en:Stone Fireplace|stone fireplace]] work well. However, they all have the downside of providing negative Heat Tolerance, making careful management necessary, or going to colder areas to make the gap between cold resistance and heat resistance bigger. You may need four or more torches, depending on the biome and the egg. |
||
| Line 78: | Line 91: | ||
=====Glued Eggs===== |
=====Glued Eggs===== |
||
While most creature's egg can be moved to its suitable location if the required temperature for incubation is not suited at its current location, some of the eggs cannot be moved once laid due to its glued nature. As such, females of the following eggs must lay their eggs at locations that allows incubation without causing complications: |
While most creature's egg can be moved to its suitable location if the required temperature for incubation is not suited at its current location, some of the eggs cannot be moved once laid due to its glued nature. As such, females of the following eggs must lay their eggs at locations that allows incubation without causing complications: |
||
| − | {{ItemList|Araneo Egg|Arthropluera Egg|Bloodstalker Egg (Genesis: Part 1)| |
+ | {{ItemList|Araneo Egg|Arthropluera Egg|Bloodstalker Egg (Genesis: Part 1)|Mantis Egg (Scorched Earth)|Moth Egg (Scorched Earth)|Pulmonoscorpius Egg}} |
| + | <!-- IS THIS STILL CORRECT - I heard you could not (since Gen 2) pick up these eggs to place in the egg incubator --> |
||
===Gestating=== |
===Gestating=== |
||
| − | During gestation, females can consume up to twice the amount of food they would normally. Ensure the expectant mother has access to plenty of food during gestation to avoid losing the baby. |
+ | During gestation, females can consume up to twice the amount of food they would normally. Ensure the expectant mother has access to plenty of food during gestation to avoid losing the baby. |
| − | The baby will need immediate attention to survive, so be sure to be there at the time the gestation ends |
+ | The baby will need immediate attention to survive, so be sure to be there at the time the gestation ends. |
| + | |||
| + | Trying to put a gestating mother into a cryopod will terminate the pregnancy. |
||
===Claiming=== |
===Claiming=== |
||
| − | Babies are born unclaimed, so a survivor must "claim" them immediately after birth by getting close to them, looking right at them, and pressing the "use" key ({{controls|use}}) to imprint them, otherwise they can be claimed by other survivors. The only exception is the {{ItemLink|Reaper King}}, which can '''only''' be claimed by the survivor who "gave birth" to it; no other survivor including the birthgiver's tribe mates can claim it. |
+ | Babies are hatched/born unclaimed, so a survivor must "claim" them immediately after birth by getting close to them, looking right at them, and pressing the "use" key ({{controls|use}}) to imprint them, otherwise they can be claimed by other survivors. The only exception is the {{ItemLink|Reaper King}}, which can '''only''' be claimed by the survivor who "gave birth" to it; no other survivor including the birthgiver's tribe mates can claim it. |
'''Warning:''' Pets set on aggressive '''attack''' unclaimed creatures as soon as they are hatched/born. Whistle "Passive" or claim babies quickly to avoid this. Also Tek Shields will 'shunt' unclaimed babies out of their radius. |
'''Warning:''' Pets set on aggressive '''attack''' unclaimed creatures as soon as they are hatched/born. Whistle "Passive" or claim babies quickly to avoid this. Also Tek Shields will 'shunt' unclaimed babies out of their radius. |
||
| Line 93: | Line 109: | ||
If babies are not very promptly claimed and then fed they can quickly die from hunger. |
If babies are not very promptly claimed and then fed they can quickly die from hunger. |
||
| + | |||
| + | You can control the hatch timing of fertilized eggs using a {{ItemLink|Preserving Bin}} or {{ItemLink|Refrigerator}}. This is not an option for live birth creatures, so make sure to time the mating and gestation appropriately. |
||
===Caring For Babies=== |
===Caring For Babies=== |
||
| − | Young animals take significant time and intensive care, especially during the "Baby" stage; if you're busy, don't breed your |
+ | Young animals take significant time and intensive care, especially during the "Baby" stage; if you're busy, don't breed your creatures right away. Alternately, you can just put the newborn baby into a cryopod for later. Most creatures will require the better part of a weekend to raise. |
| − | New babies follow the nearest survivor if one is within a reasonable range, so survivors will probably want to disable these settings. New babies have extremely low health, carrying capacity and food, so survivors need to carefully feed and take care of them in their first moments of life, or they'll soon die. The creature must be fed by adding food to their inventory. Once they reach |
+ | New babies follow the nearest survivor if one is within a reasonable range, so survivors will probably want to disable these settings. New babies have extremely low health, carrying capacity and food, so survivors need to carefully feed and take care of them in their first moments of life, or they'll soon die. The creature must be fed by adding food to their inventory. Once they reach Juvenile phase of their maturation (10.1%) they can eat from a {{ItemLink|Feeding Trough}} or {{ItemLink|Tek Trough}} to ensure the creature has a sufficient food supply. The maturation progress and phase is shown when looking at the creature. |
| − | Babies dynamically gain more [[Health|HP]], [[Food|food capacity]], and [[Weight|carrying capacity]] as they mature over time. They need lots of food because the babies eat very quickly, so stock up beforehand while the mother is pregnant/the egg is |
+ | Babies dynamically gain more [[Health|HP]], [[Food|food capacity]], and [[Weight|carrying capacity]] as they mature over time. They need lots of food because the babies eat very quickly, so stock up beforehand while the mother is pregnant/the egg is incubating. |
Babies are not mountable and flee from fights. Mounts that can carry creatures (e.g. the {{ItemLink|Argentavis}}) can carry babies, which allows you to quickly reposition the little ones if needed. |
Babies are not mountable and flee from fights. Mounts that can carry creatures (e.g. the {{ItemLink|Argentavis}}) can carry babies, which allows you to quickly reposition the little ones if needed. |
||
| + | |||
| + | The {{ItemLink|Procoptodon}} and the {{ItemLink|Maewing}} are two creatures that can help with raising babies. |
||
It takes a long time for babies to mature; breeding should only be attempted if you or your tribe have the time. As the baby grows, you will be able to leave the baby alone for longer and longer periods of time. One good use of a survivor's time at this stage might be crafting kibble for imprinting. If you will be imprinting, the baby might request any of 6 different [[kibble]]s (on PC and Console) or 15 different kibbles (on Mobile), so make sure you have them on hand. |
It takes a long time for babies to mature; breeding should only be attempted if you or your tribe have the time. As the baby grows, you will be able to leave the baby alone for longer and longer periods of time. One good use of a survivor's time at this stage might be crafting kibble for imprinting. If you will be imprinting, the baby might request any of 6 different [[kibble]]s (on PC and Console) or 15 different kibbles (on Mobile), so make sure you have them on hand. |
||
====Caring for Baby Carnivores==== |
====Caring for Baby Carnivores==== |
||
| − | Baby carnivores are especially difficult to raise as it takes a minimum of 48 real hours to mature them, and a stack of meat spoils every 26.6 real hours (40 x 40 mins) in the feeding trough. Therefore their feeding trough must be topped up every 26 hours to continue their development. Failure to do so |
+ | Baby carnivores are especially difficult to raise as it takes a minimum of 48 real hours to mature them, and a stack of meat spoils every 26.6 real hours (40 x 40 mins) in the feeding trough. Therefore their feeding trough must be topped up every 26 hours to continue their development. Failure to do so could result in starvation to death. By using Fish Meat, this time is doubled to 53.3 hours (40 x 80 mins), although Raw Fish Meat is only half as nutritious as Raw Meat, so babies will need twice as much meat. Creatures* will eat food with the lowest food value first (see food table below), thus fish meat before raw meat, so mixing the two will result in the longer keeping fish meat being eaten first. After progression to Juvenile phase, the creatures can eat from a trough, but will starve if not fed. |
This is less of an issue for herbivores, because a stack of 100 berries lasts 66 real hours (2.7 days) before spoiling, a much more manageable interval. Remember not to try and feed the babies with stim or narcoberries because they won't eat them. |
This is less of an issue for herbivores, because a stack of 100 berries lasts 66 real hours (2.7 days) before spoiling, a much more manageable interval. Remember not to try and feed the babies with stim or narcoberries because they won't eat them. |
||
| Line 112: | Line 132: | ||
<nowiki>*</nowiki>Few creatures, like [[Baryonyx]] and [[Pelagornis]] will eat [[Raw Fish Meat]] before [[Cooked Fish Meat]] and they only eat fish meat. Similarly, their offspring will '''only''' eat raw fish meat until reaching adulthood. |
<nowiki>*</nowiki>Few creatures, like [[Baryonyx]] and [[Pelagornis]] will eat [[Raw Fish Meat]] before [[Cooked Fish Meat]] and they only eat fish meat. Similarly, their offspring will '''only''' eat raw fish meat until reaching adulthood. |
||
| + | The use of a powered {{ItemLink|Tek Trough}} that can store more items and acts like a refrigerator extending the spoil time is recommended. |
||
| ⚫ | |||
| + | |||
| ⚫ | |||
{{DLC section|Scorched Earth, Aberration, Genesis: Part 1, Crystal Isles}} |
{{DLC section|Scorched Earth, Aberration, Genesis: Part 1, Crystal Isles}} |
||
| − | Babies hatched from Egg-only taming (with the exception of {{ItemLink|Deinonychus}}) only |
+ | Babies hatched from Egg-only taming (with the exception of {{ItemLink|Deinonychus}}) only take a specific food until they fully mature. While their food drops down slower than other babies, feeding them with their usual food will not replenish their food. |
*{{ItemLink|Wyvern}} = Only takes in {{ItemLink|Wyvern Milk}} which can be obtained by either knocking out an adult wild female {{ItemLink|Wyvern}}, or killing {{ItemLink|Alpha Fire Wyvern}}. |
*{{ItemLink|Wyvern}} = Only takes in {{ItemLink|Wyvern Milk}} which can be obtained by either knocking out an adult wild female {{ItemLink|Wyvern}}, or killing {{ItemLink|Alpha Fire Wyvern}}. |
||
*{{ItemLink|Rock Drake}} = Only takes in {{ItemLink|Nameless Venom}} which can sometimes be gained by killing {{ItemLink|Nameless}}. |
*{{ItemLink|Rock Drake}} = Only takes in {{ItemLink|Nameless Venom}} which can sometimes be gained by killing {{ItemLink|Nameless}}. |
||
| − | *{{ItemLink|Magmasaur}} = Only takes in {{ItemLink|Ambergris (Genesis: Part 1)|Ambergris}} which can sometimes be harvested from the green-cracked rock formations in Lunar Biome at [[Genesis: Part 1|Genesis Simulation]]. |
+ | *{{ItemLink|Magmasaur}} = Only takes in {{ItemLink|Sulfur}} or {{ItemLink|Ambergris (Genesis: Part 1)|Ambergris}} which can sometimes be harvested from the green-cracked rock formations in Lunar Biome at [[Genesis: Part 1|Genesis Simulation]] or in [[-Space- (Genesis: Part 2)#Resources|Ringed Asteroid at - Space - in Genesis Ship]]. |
*{{ItemLink|Crystal Wyvern}} = Only takes in {{ItemLink|Primal Crystal (Crystal Isles)}} which can be obtained by gathering (with "Use") from a knocked out adult wild {{ItemLink|Crystal Wyvern}}. |
*{{ItemLink|Crystal Wyvern}} = Only takes in {{ItemLink|Primal Crystal (Crystal Isles)}} which can be obtained by gathering (with "Use") from a knocked out adult wild {{ItemLink|Crystal Wyvern}}. |
||
| Line 135: | Line 157: | ||
=====Beelzebufo===== |
=====Beelzebufo===== |
||
Until adulthood maturity, Beelzebufo babies '''must''' always be kept inside water. Any attempt to pull it out even as Adolescent will easily kill it. |
Until adulthood maturity, Beelzebufo babies '''must''' always be kept inside water. Any attempt to pull it out even as Adolescent will easily kill it. |
||
| + | |||
====Food Values==== |
====Food Values==== |
||
| − | [[Carnivores]] will only eat meat, while [[herbivores]] will only eat berries. During the baby phase, you have to hand feed the baby until it reaches the juvenile |
+ | [[Carnivores]] will only eat meat, while [[herbivores]] will only eat berries. During the baby phase, you have to hand feed the baby until it reaches the juvenile phase. This can take quite a long time so be prepared and have time to sit around feeding a baby. |
{|class="wikitable sortable" |
{|class="wikitable sortable" |
||
!Food |
!Food |
||
| Line 142: | Line 165: | ||
|- |
|- |
||
| Preferred {{ItemLink|Kibble}} |
| Preferred {{ItemLink|Kibble}} |
||
| − | |80 (53.33 |
+ | |80 (53.33*) |
|- |
|- |
||
| {{ItemLink|Kibble}} made from {{ItemLink|Prime Meat Jerky}} (excluding Carbonemys kibble) |
| {{ItemLink|Kibble}} made from {{ItemLink|Prime Meat Jerky}} (excluding Carbonemys kibble) |
||
| Line 151: | Line 174: | ||
|- |
|- |
||
| {{ItemLink|Raw Prime Meat}} / {{ItemLink|Raw Meat}} / {{ItemLink|Raw Mutton}} |
| {{ItemLink|Raw Prime Meat}} / {{ItemLink|Raw Meat}} / {{ItemLink|Raw Mutton}} |
||
| − | |50 |
+ | |50** |
|- |
|- |
||
| {{ItemLink|Spoiled Meat}} |
| {{ItemLink|Spoiled Meat}} |
||
| − | |50* |
+ | |50*** |
|- |
|- |
||
|{{ItemLink|Cooked Prime Meat}} / {{ItemLink|Prime Meat Jerky}} |
|{{ItemLink|Cooked Prime Meat}} / {{ItemLink|Prime Meat Jerky}} |
||
| Line 178: | Line 201: | ||
|} |
|} |
||
| − | <nowiki>*</nowiki>only |
+ | <nowiki>*</nowiki> Brontos only gain 53.33 food points from their preferred {{ItemLink|Kibble (Carbonemys Egg)}}<br/> |
| − | <nowiki>**</nowiki> |
+ | <nowiki>**</nowiki> some creatures have different values for raw meat, e.g. the {{ItemLink|Bloodstalker}} gains only 10 for each raw meat.<br/> |
| + | <nowiki>***</nowiki> only for {{ItemLink|Scorpion}}s, {{ItemLink|Vulture}}s and {{ItemLink|Mantis}}. |
||
===Maturation Phases & Food Consumption=== |
===Maturation Phases & Food Consumption=== |
||
{|class="wikitable sortable" |
{|class="wikitable sortable" |
||
!Maturation Progress |
!Maturation Progress |
||
| + | !Phase |
||
| − | !Name |
||
|- |
|- |
||
| 0%-10% |
| 0%-10% |
||
| Line 196: | Line 220: | ||
|} |
|} |
||
| − | Food consumption by babies is very large and varies by the maturation progress dynamically |
+ | Food consumption by babies is very large and varies by the maturation progress dynamically by the following formula: |
| − | FoodPerSec = |
+ | FoodPerSec = R * (1 - maturationRatio) , with R = basic food drain rate |
| ⚫ | |||
| + | |||
| ⚫ | |||
| + | The basic food drain rate varies per creature. For example, this value for a Rex baby is around R=1.16, while the Bloodstalker has a base food drain rate of R=0.785 (further measurements needed for other creatures). |
||
| + | |||
| + | The Rock Drake has a basic food drain of R = 0.1, other special creatures like Wyvern and Magmasaur may have an equivalent food consumption (not tested yet). |
||
| + | |||
| ⚫ | |||
| + | |||
| ⚫ | |||
Use a '''[[Apps|calculator]]''' to determine the needed food and time, e.g.<ref>[http://ark.crumplecorn.com/breeding/ Crumplecorn's Breeding Calculator]</ref> |
Use a '''[[Apps|calculator]]''' to determine the needed food and time, e.g.<ref>[http://ark.crumplecorn.com/breeding/ Crumplecorn's Breeding Calculator]</ref> |
||
====Notes==== |
====Notes==== |
||
| − | * |
+ | * Each creature seems to have a different food consumption rate that appears to change with each stage of the maturation progress (at least for wolves and Dodos). |
=== Imprinting === |
=== Imprinting === |
||
{{Main|Imprinting}} |
{{Main|Imprinting}} |
||
| − | Imprinting is a way to improve the stat-values of a bred creature. It requires one of three interactions (giving [[Imprinting/Kibble List|specific kibble]], cuddling |
+ | Imprinting is a way to improve the stat-values of a bred creature. It requires one of three interactions (giving [[Imprinting/Kibble List|specific kibble]], cuddling or walking) every 8* hours. Only a single player can imprint a newborn baby (whoever claims it first). There is no penalty for not imprinting, but no gain either. Any imprinting done is permanent. Accumulated imprinting values will not be lost if you miss an imprint. |
If this player manages to care for the baby during the entire maturation, the creature's base stats before modifications will be increased by 20% and, when ridden by the imprinter, it will also gain 30% increased damage and damage resistance. |
If this player manages to care for the baby during the entire maturation, the creature's base stats before modifications will be increased by 20% and, when ridden by the imprinter, it will also gain 30% increased damage and damage resistance. |
||
| + | |||
| + | <nowiki>*</nowiki> The time between imprint and the amount of imprint gained per imprint can change if an [[Events|event]] is happening. Keep an eye out on the HUD for when the next imprint is required. |
||
===Sterile Creatures=== |
===Sterile Creatures=== |
||
| Line 220: | Line 252: | ||
{{CreatureListProperty|Breedable|No|Tameable|1}} |
{{CreatureListProperty|Breedable|No|Tameable|1}} |
||
| − | Despite |
+ | Despite in-game showing the {{ItemLink|Reaper King}} as breedable, it is impossible due to how they are "tamed", with the added fact they are shown as genderless. |
In [[ARK: Survival Evolved Mobile]], {{ItemLink|Royal Griffin}} has gender and can be bred. However, they will only mate with members of the same house (they must have the same 2-3 last letters in their names). |
In [[ARK: Survival Evolved Mobile]], {{ItemLink|Royal Griffin}} has gender and can be bred. However, they will only mate with members of the same house (they must have the same 2-3 last letters in their names). |
||
==Times for Breeding== |
==Times for Breeding== |
||
| − | {{ |
+ | {{Table of Breeding}} |
| − | {{ |
+ | {{Table of Mammal Breeding}} |
==Stats of the Offspring== |
==Stats of the Offspring== |
||
{{#ev:youtube|mHnYnvL-icU|450|right|In-Depth look at Breeding Super Dinos|frame}} |
{{#ev:youtube|mHnYnvL-icU|450|right|In-Depth look at Breeding Super Dinos|frame}} |
||
| − | The spawn of two dinosaurs will inherit the "natural" stat levels of its parents. Natural stat levels are the levels in each stat after it has been tamed but before it gains any stats through leveling-up by a player. There is a 55% chance of inheriting the stronger stat of each parent. This means you have a certain percent chance of obtaining a 100% perfect (meaning with only the higher stats of both parents) |
+ | The spawn of two dinosaurs will inherit the "natural" stat levels of its parents. Natural stat levels are the levels in each stat after it has been tamed but before it gains any stats through leveling-up by a player. There is a 55% chance of inheriting the stronger stat of each parent. This means you have a certain percent chance of obtaining a 100% perfect (meaning with only the higher stats of both parents) creature from both parents from each mating. |
The stat-values (not the stat-levels) of the offspring are calculated like for a creature that was just tamed with a 100% taming effectiveness with the taming effectiveness bonuses applied. This means that an offspring can have higher values than its parents in stats that get a bonus from taming effectiveness (for most creatures this is [[Melee Damage]] and sometimes [[Food]]). See also [[Creature stats calculation]] for how the values are calculated from the stats. |
The stat-values (not the stat-levels) of the offspring are calculated like for a creature that was just tamed with a 100% taming effectiveness with the taming effectiveness bonuses applied. This means that an offspring can have higher values than its parents in stats that get a bonus from taming effectiveness (for most creatures this is [[Melee Damage]] and sometimes [[Food]]). See also [[Creature stats calculation]] for how the values are calculated from the stats. |
||
===Example=== |
===Example=== |
||
| − | To understand this better, here is an example. Let's only look at the melee damage of a pair of [[Raptor]]s. Assume they were just tamed with a taming effectiveness of 70% and |
+ | To understand this better, here is an example. Let's only look at the melee damage of a pair of [[Raptor]]s. Assume they were just tamed with a taming effectiveness of 70% and both already have 4 levels in melee damage. The value you can see as melee damage is according to the formula on [[Creature stats calculation]], the newly added extra modifier (balancing update), and the [[Raptor#Base Stats and Growth|stats of the raptors]] |
Value = (BaseStat × ( 1 + LevelWild × IncreaseWild) + TamingBonusAdd × TamingBonusAddModifier) × (1 + TamingEffectiveness × TamingBonusMult × TamingBonusMultModifier) |
Value = (BaseStat × ( 1 + LevelWild × IncreaseWild) + TamingBonusAdd × TamingBonusAddModifier) × (1 + TamingEffectiveness × TamingBonusMult × TamingBonusMultModifier) |
||
Value = (100% × ( 1 + 4 × 5%) + 50% × 15%) × (1 + 70% × 40% × 45%) |
Value = (100% × ( 1 + 4 × 5%) + 50% × 15%) × (1 + 70% × 40% × 45%) |
||
Value = 127.5% × 112.6% |
Value = 127.5% × 112.6% |
||
Value = 143.6% |
Value = 143.6% |
||
| − | The offspring inherits the values of its parents. |
+ | The offspring inherits the values of its parents. They don't inherit the plain value, but the levels the parents spend in the stats before being leveled up by a player. So the offspring inherits 4 levels for its melee damage (as both parents have 4 levels in this case). To get the value of the melee damage of the offspring, we calculate it like before, but this time we use a taming effectiveness of 100% (this is the way the game gives you another bonus if you breed creatures). |
Value = (BaseStat × ( 1 + LevelWild × IncreaseWild) + TamingBonusAdd × TamingBonusAddModifier) × (1 + TamingEffectiveness × TamingBonusMult × TamingBonusMultModifier) |
Value = (BaseStat × ( 1 + LevelWild × IncreaseWild) + TamingBonusAdd × TamingBonusAddModifier) × (1 + TamingEffectiveness × TamingBonusMult × TamingBonusMultModifier) |
||
Value = (100% × ( 1 + 4 × 5%) + 50% × 15%) × (1 + 100% × 40% × 45%) |
Value = (100% × ( 1 + 4 × 5%) + 50% × 15%) × (1 + 100% × 40% × 45%) |
||
| Line 246: | Line 278: | ||
Value = 150.5% |
Value = 150.5% |
||
| − | + | Like the parents, the offspring has 4 levels in melee damage, but with the higher taming-effectiveness-bonus its value is 150.5% instead of 143.6%. The bonus is not much, but is clearly noticeable. |
|
===Amount of higher stats and chance of obtaining them when hatching=== |
===Amount of higher stats and chance of obtaining them when hatching=== |
||
{| class="wikitable" |
{| class="wikitable" |
||
|- |
|- |
||
| − | ! Number of desired |
+ | ! Number of desired stats !! Probability <nowiki>[%]</nowiki> |
|- |
|- |
||
| 6 ||2.77% |
| 6 ||2.77% |
||
| Line 273: | Line 305: | ||
===Level of the Offspring=== |
===Level of the Offspring=== |
||
| − | The resulting level of the baby is the sum of wild level-points (i.e. level of the |
+ | The resulting level of the baby is the sum of wild level-points (i.e. level of the creature directly after taming) spent in the inherited stats by its parents. Assume for example, that one (highly unusual) parent has only leveled up in Health 40 levels and nothing else, while the other parent leveled up only in weight 30 levels. If the baby happens to inherit these higher stats, it inherits 70 levelups giving it level 71 with its starting level. Other possibilities are a level 41 Baby with only health leveled up, a level 31 baby with only weight leveled up or a baby with level 1 and nothing leveled up. |
The (practically impossible to reach) maximum of levels a baby can get would be 223 levelups (149 natural + 74 by taming bonus (TE of nearly 100%)) in each stat, with 7 stats summing up to level 1562 (223 levelups in 7 stats plus the startinglevel: 223 x 7 + 1 = 1562). |
The (practically impossible to reach) maximum of levels a baby can get would be 223 levelups (149 natural + 74 by taming bonus (TE of nearly 100%)) in each stat, with 7 stats summing up to level 1562 (223 levelups in 7 stats plus the startinglevel: 223 x 7 + 1 = 1562). |
||
| − | One would need to find an average of 2.863×10^188 number of any |
+ | One would need to find an average of 2.863×10^188 number of any creature to get all 223 wild stats put into any specific stat, assuming all levels have the same chance of spawning [1/((1/7)^223)]. |
Note that the levels a wild animal wastes in the movement stat is remembered and passed on during breeding. Thus two siblings with seemingly identical stats might have different levels if one of them inherited a higher movement stat than the other. This has one practical advantage: a higher torpor level. |
Note that the levels a wild animal wastes in the movement stat is remembered and passed on during breeding. Thus two siblings with seemingly identical stats might have different levels if one of them inherited a higher movement stat than the other. This has one practical advantage: a higher torpor level. |
||
| − | Note that the cap level of |
+ | Note that the cap level of creature on official are 450, after this level your creature will be deleted by server restart, transferring or if you cryo pod it. |
====Example==== |
====Example==== |
||
| Line 428: | Line 460: | ||
To get to the creature's level, you add up the levels of the stats and add one, as all creatures start at level one. |
To get to the creature's level, you add up the levels of the stats and add one, as all creatures start at level one. |
||
==Notes/Trivia== |
==Notes/Trivia== |
||
| + | * Contrary to popular myths, the {{ItemLink|Oviraptor}}s and {{ItemLink|Unicorn}}s do not increase chances for twins, triplets nor mutations. |
||
| − | * The {{ItemLink|Titanoboa}}, {{ItemLink|Basilisk}}, |
+ | * The {{ItemLink|Titanoboa}}, {{ItemLink|Basilisk}}, {{ItemLink|Coelacanth}}, {{ItemLink|Piranha}}, {{ItemLink|Sabertooth Salmon}}, {{ItemLink|Karkinos}}, {{ItemLink|Dung Beetle}}, {{ItemLink|Astrocetus}}, {{ItemLink|Lamprey}} and {{ItemLink|Trilobite}} cannot be bred when domesticated. |
** However, in the real world all reptiles, fish, crustaceans, snails, whales, and Trilobites and Dung Beetles are able to breed. |
** However, in the real world all reptiles, fish, crustaceans, snails, whales, and Trilobites and Dung Beetles are able to breed. |
||
== External Video Tutorials == |
== External Video Tutorials == |
||
| − | {{#ev:youtube|https://www.youtube.com/watch?v=UD18yiPLuXY |
+ | {{#ev:youtube|https://www.youtube.com/watch?v=UD18yiPLuXY|||Quick tutorial on hatching eggs}} |
| ⚫ | |||
| − | |||
| ⚫ | |||
== References == |
== References == |
||
Latest revision as of 22:23, 19 August 2023
|
A Raptor and his offspring
Breeding is a feature of ARK: Survival Evolved that allows players to breed improved creatures through Eggs with non-mammals and gestation with mammals. Eggs do not have an owner, so it's possible to steal eggs laid by other survivors' creatures.
Newborn creatures are simply claimed (imprinted on) and do not require the usual taming processes associated with wild creatures. Anyone can claim a newborn. This must be done promptly, along with feeding it, as babies can die quickly from hunger.
Breeding Mechanics
Preparing Mating
The first step of breeding is having two opposite sex creatures of the same species for mating. Original, Tek, Aberrant, X, and R variants of creatures count as separate species, and as such, cannot be cross-bred. They must be bred with their own variant. Most creatures can be bred; those few that cannot are listed at the bottom of this article. See Sterile Creatures for more information.
Always be prepared for having more than one baby to be born upon incubation/gestation completion. There is a 10% chance of twins, and a 2% chance of triplets.[1]
It has been confirmed that there is no creature in the game capable of affecting chances of mutations, twins and triplets.[2]
Mating Requirements
For creatures to successfully mate, they must be:
- of same species
- of opposite sex (one male and one female)
- within mating range of each other
- wandering or set to mate (Enable Wandering or Enable Mating must be enabled on both creatures)
- not following anything (Disable Following on both creatures)
- unburdened (the creatures must not be carrying so much weight they are unable to move)
- not mounted
- not spayed/neutered
- not having a mating cooldown (once mated females have a mating cooldown interval before they can mate again, the cooldown can also be triggered when transferring the creature between Arks)
Mating Range While Wandering
If using the Enable Wandering method to allow for mating, then steps need to be taken to maintain the mating range, which varies between species and is loosely based on the size of the adult creature. If the mating pair wander outside the mating range, then mating is stopped and mating progress is reset.
Building a pen of a suitably small size to keep the wandering creatures within mating range of each other is one common approach.
You can also use the "Whistle Stop (All)" command (U on PC). This halts all creatures within the area to stop moving, even ones that are enabled to wander. It's best to use the whistle every time the creature starts to move again, or to prevent the creatures from ever moving, whistle constantly. While this method doesn't need a pen, it does need you or a tribe member to stay there and constantly whistle. This may be more helpful if one survivor is constantly whistling not to move, and another survivor enables the creatures nearby to wander. In this way, you can achieve mass breeding in an area without ever building a pen, or moving creatures.
To initiate breeding of a pair by yourself, whistle both creatures to follow you, then enable wandering. Then, disable following on both. This prevents them from walking around in the meantime.
It is possible to use the ![]() Dino Leash
Dino Leash ![]() , to restrict the range for mating. Then no mating pen is needed.
, to restrict the range for mating. Then no mating pen is needed.
If you do not want to build a pen, whistle or use a leash; then you can simply use enable mating instead, this will make the creatures stand still and then they will start to mate.
Mating
When the above conditions are all met, a small red heart icon appears over the heads of the mating creatures, and a mating bar appears on the female's HUD (look at the female to reveal the HUD). The HUD also indicates which creature they are mating with. Ensure the mating animals remain close together, as otherwise the mating stops. Due to server lag and game mechanics, the mating bar does not continuously update in real time. Additionally, mating multiple females to a single male at the same time can make this worse. Patience is advised as the bar moves in leaps and bounds.
Once the mating bar is completed, non-mammalian females drop a single fertilized egg , and mammalian females start gestating.
If there are too many tamed creatures in the server or in the tribe, the pair will refuse to mate until there is a free spot.
Special Conditions of Mating
Some of the creatures will only mate when certain conditions are given.
 Royal Griffin - will only mate with the other gender with similar surname.
- Ferox - will only mate when the female is at least 95%+ addiction as a small creature.
- Magmasaur - will only mate when the female is submerged in the lava surface in Volcano Region on any map.
- Megachelon - will only mate at deep depths in the ocean.
- Beelzebufo - will only mate in water.
- Diplocaulus - will only mate in water.
Mating Wait Interval
Females cannot mate again until a mating wait interval has passed (Cryofreezing them will still continue the mating interval cooldown). This interval is indicated on their HUD.
The mating interval starts after the creature has laid the egg or gestation has completed. The mating interval is also started for female creatures that are transferred between servers. Males can mate at any time.
Incubation
- Main article: Incubation
The fertilized egg itself only begins Incubation when dropped onto the floor/ground or placed correctly in an ![]() Egg Incubator (Genesis: Part 2). When incubating, a Fertilized Egg must be kept at a certain temperature range depending on the species (this also factors in insulation). If outside of this temperature range, incubation won't make progress, and it loses "Fertilized Egg Health" over time and is destroyed if this reaches zero. This is all indicated on the HUD when looking at a Fertilized Egg, along with its parents.
Egg Incubator (Genesis: Part 2). When incubating, a Fertilized Egg must be kept at a certain temperature range depending on the species (this also factors in insulation). If outside of this temperature range, incubation won't make progress, and it loses "Fertilized Egg Health" over time and is destroyed if this reaches zero. This is all indicated on the HUD when looking at a Fertilized Egg, along with its parents.
You can always "pause" the incubation by picking up the egg and putting it in a ![]() Refrigerator,
Refrigerator, ![]() Preserving Bin or other Inventory.
Preserving Bin or other Inventory.
The following eggs are an exception due to the nature of how it is obtained (no health loss in inadequate temperature area):
If there are too many tamed creatures in the server or in the tribe, the egg will continue to incubate with no timer information, but letting it hatch will not yield a baby.
Managing Temperature
The best method to ensure eggs are at an appropriate temperature for incubation is through insulation. Use one or more ![]() Air Conditioner,
Air Conditioner, ![]() Dimetrodon,
Dimetrodon, ![]() Kairuku or
Kairuku or ![]() Otter. Six
Otter. Six ![]() Air Conditioner should work for all eggs but eight is ideal for when there is a heat/cold storm. You might need up to 14 or more Air Conditioners for larger eggs such as the
Air Conditioner should work for all eggs but eight is ideal for when there is a heat/cold storm. You might need up to 14 or more Air Conditioners for larger eggs such as the ![]() Giganotosaurus, or the
Giganotosaurus, or the ![]() Wyvern in Scorched Earth or Ragnarok. The
Wyvern in Scorched Earth or Ragnarok. The ![]() Rock Drake in Aberration requires at least 15 Air Conditioners due to its very cold incubation requirement. Whereas the
Rock Drake in Aberration requires at least 15 Air Conditioners due to its very cold incubation requirement. Whereas the ![]() Deinonychus from Valguero needs a rough 23 Air Conditioners in the snow because of its extreme heat required.
Deinonychus from Valguero needs a rough 23 Air Conditioners in the snow because of its extreme heat required.
With the release of Genesis: Part 2, the introduction of the ![]() Egg Incubator (Genesis: Part 2) allows for yet another way to incubate eggs.
Egg Incubator (Genesis: Part 2) allows for yet another way to incubate eggs.
Another way is to tame a handful of ![]() Dimetrodon. These seemingly useless finned creatures are actually one of the best sources of insulation in the entire game. The higher their melee damage, the higher their insulation bonus is; at ~1000 melee damage, it can even raise Wyvern eggs. The insulation effect stacks with other Dimetrodons, so if one isn't enough to do the job, try two, or three, or more. Far cheaper to maintain than the expensive air conditioners, these guys are mobile and only need meat, compared to the stationary air conditioner that also needs electricity to run. However, everything has its drawbacks: the Dimetrodon is slow and hard to transport on foot; they are hard to tame due to where they spawn and their fast torpor drop. However, it is worth the risk, especially on Aberration, where
Dimetrodon. These seemingly useless finned creatures are actually one of the best sources of insulation in the entire game. The higher their melee damage, the higher their insulation bonus is; at ~1000 melee damage, it can even raise Wyvern eggs. The insulation effect stacks with other Dimetrodons, so if one isn't enough to do the job, try two, or three, or more. Far cheaper to maintain than the expensive air conditioners, these guys are mobile and only need meat, compared to the stationary air conditioner that also needs electricity to run. However, everything has its drawbacks: the Dimetrodon is slow and hard to transport on foot; they are hard to tame due to where they spawn and their fast torpor drop. However, it is worth the risk, especially on Aberration, where ![]() Rock Drake Egg would normally require many air conditioners.
Rock Drake Egg would normally require many air conditioners.
At the beginning of the game, when the Air Conditioner or Dimetrodon are not yet available, use a heat source to regulate the egg's temperature. ![]() Standing Torch,
Standing Torch, ![]() Torch,
Torch, ![]() Campfire,
Campfire, ![]() Industrial Cooker, and
Industrial Cooker, and ![]() stone fireplace work well. However, they all have the downside of providing negative Heat Tolerance, making careful management necessary, or going to colder areas to make the gap between cold resistance and heat resistance bigger. You may need four or more torches, depending on the biome and the egg.
stone fireplace work well. However, they all have the downside of providing negative Heat Tolerance, making careful management necessary, or going to colder areas to make the gap between cold resistance and heat resistance bigger. You may need four or more torches, depending on the biome and the egg.
Since temperature gradients can be very extreme between regions, easily reaching 20 °C or more, you can try and find a nearby biome where the temperature is closer to the eggs' ideal point; this is usually in the biome that spawned the creature. Early in the game, it is easier to find a biome that is too cold (e.g. near the coast) and heat the egg with torches, rather than trying to cool down a hot biome.
As Fertilized Eggs don't lose Egg Health in an inventory, and spoil incredibly slowly, you can keep them in your Inventory or in a preserving bin/refrigerator until able to achieve the appropriate temperature needed for Incubating. This can be very useful if you settled in a region with extreme temperatures as it's especially difficult to cool an egg in a hot biome without an air conditioner when it gets too hot.
Glued Eggs
While most creature's egg can be moved to its suitable location if the required temperature for incubation is not suited at its current location, some of the eggs cannot be moved once laid due to its glued nature. As such, females of the following eggs must lay their eggs at locations that allows incubation without causing complications:
Gestating
During gestation, females can consume up to twice the amount of food they would normally. Ensure the expectant mother has access to plenty of food during gestation to avoid losing the baby.
The baby will need immediate attention to survive, so be sure to be there at the time the gestation ends.
Trying to put a gestating mother into a cryopod will terminate the pregnancy.
Claiming
Babies are hatched/born unclaimed, so a survivor must "claim" them immediately after birth by getting close to them, looking right at them, and pressing the "use" key (E, ![]() ,
, ![]() ) to imprint them, otherwise they can be claimed by other survivors. The only exception is the
) to imprint them, otherwise they can be claimed by other survivors. The only exception is the ![]() Reaper King, which can only be claimed by the survivor who "gave birth" to it; no other survivor including the birthgiver's tribe mates can claim it.
Reaper King, which can only be claimed by the survivor who "gave birth" to it; no other survivor including the birthgiver's tribe mates can claim it.
Warning: Pets set on aggressive attack unclaimed creatures as soon as they are hatched/born. Whistle "Passive" or claim babies quickly to avoid this. Also Tek Shields will 'shunt' unclaimed babies out of their radius.
- As of 264.5, Auto Turrets and Plant Species X set to "Players and Tamed Creatures" will NOT attack unclaimed creatures after they are hatched/born. You can safely place turrets inside a hatching pen without fearing for babies' lives.
If babies are not very promptly claimed and then fed they can quickly die from hunger.
You can control the hatch timing of fertilized eggs using a ![]() Preserving Bin or
Preserving Bin or ![]() Refrigerator. This is not an option for live birth creatures, so make sure to time the mating and gestation appropriately.
Refrigerator. This is not an option for live birth creatures, so make sure to time the mating and gestation appropriately.
Caring For Babies
Young animals take significant time and intensive care, especially during the "Baby" stage; if you're busy, don't breed your creatures right away. Alternately, you can just put the newborn baby into a cryopod for later. Most creatures will require the better part of a weekend to raise.
New babies follow the nearest survivor if one is within a reasonable range, so survivors will probably want to disable these settings. New babies have extremely low health, carrying capacity and food, so survivors need to carefully feed and take care of them in their first moments of life, or they'll soon die. The creature must be fed by adding food to their inventory. Once they reach Juvenile phase of their maturation (10.1%) they can eat from a ![]() Feeding Trough or
Feeding Trough or ![]() Tek Trough to ensure the creature has a sufficient food supply. The maturation progress and phase is shown when looking at the creature.
Tek Trough to ensure the creature has a sufficient food supply. The maturation progress and phase is shown when looking at the creature.
Babies dynamically gain more HP, food capacity, and carrying capacity as they mature over time. They need lots of food because the babies eat very quickly, so stock up beforehand while the mother is pregnant/the egg is incubating.
Babies are not mountable and flee from fights. Mounts that can carry creatures (e.g. the ![]() Argentavis) can carry babies, which allows you to quickly reposition the little ones if needed.
Argentavis) can carry babies, which allows you to quickly reposition the little ones if needed.
The ![]() Procoptodon and the
Procoptodon and the ![]() Maewing are two creatures that can help with raising babies.
Maewing are two creatures that can help with raising babies.
It takes a long time for babies to mature; breeding should only be attempted if you or your tribe have the time. As the baby grows, you will be able to leave the baby alone for longer and longer periods of time. One good use of a survivor's time at this stage might be crafting kibble for imprinting. If you will be imprinting, the baby might request any of 6 different kibbles (on PC and Console) or 15 different kibbles (on Mobile), so make sure you have them on hand.
Caring for Baby Carnivores
Baby carnivores are especially difficult to raise as it takes a minimum of 48 real hours to mature them, and a stack of meat spoils every 26.6 real hours (40 x 40 mins) in the feeding trough. Therefore their feeding trough must be topped up every 26 hours to continue their development. Failure to do so could result in starvation to death. By using Fish Meat, this time is doubled to 53.3 hours (40 x 80 mins), although Raw Fish Meat is only half as nutritious as Raw Meat, so babies will need twice as much meat. Creatures* will eat food with the lowest food value first (see food table below), thus fish meat before raw meat, so mixing the two will result in the longer keeping fish meat being eaten first. After progression to Juvenile phase, the creatures can eat from a trough, but will starve if not fed.
This is less of an issue for herbivores, because a stack of 100 berries lasts 66 real hours (2.7 days) before spoiling, a much more manageable interval. Remember not to try and feed the babies with stim or narcoberries because they won't eat them.
*Few creatures, like Baryonyx and Pelagornis will eat Raw Fish Meat before Cooked Fish Meat and they only eat fish meat. Similarly, their offspring will only eat raw fish meat until reaching adulthood.
The use of a powered ![]() Tek Trough that can store more items and acts like a refrigerator extending the spoil time is recommended.
Tek Trough that can store more items and acts like a refrigerator extending the spoil time is recommended.
Caring for Babies from Egg-only Tames
| This section is about content exclusive to the DLC: Scorched Earth, Aberration, Genesis: Part 1, Crystal Isles |
Babies hatched from Egg-only taming (with the exception of ![]() Deinonychus) only take a specific food until they fully mature. While their food drops down slower than other babies, feeding them with their usual food will not replenish their food.
Deinonychus) only take a specific food until they fully mature. While their food drops down slower than other babies, feeding them with their usual food will not replenish their food.
- Wyvern = Only takes in Wyvern Milk which can be obtained by either knocking out an adult wild female Wyvern, or killing Alpha Fire Wyvern.
- Rock Drake = Only takes in Nameless Venom which can sometimes be gained by killing Nameless.
- Magmasaur = Only takes in Sulfur or Ambergris which can sometimes be harvested from the green-cracked rock formations in Lunar Biome at Genesis Simulation or in Ringed Asteroid at - Space - in Genesis Ship.
- Crystal Wyvern = Only takes in Primal Crystal which can be obtained by gathering (with "Use") from a knocked out adult wild Crystal Wyvern.
Special Caring
Some babies require special caring. Effects can be disastrous if not cared for properly.
Reaper King
| This section is about content exclusive to the DLC: Aberration |
For details on taking care of baby Reaper King or how to obtain them, check its own article.
Reaper King babies will attack any dino and any survivor around if it is able to reach towards them and will be constantly on wander (with no options to stop wandering or follow target). It will not attack the birth giver with ![]() Reaper Pheromone Gland
Reaper Pheromone Gland ![]() effect. Once it reaches Juvenile however, it will stop randomly attacking and can be ordered like every other baby.
effect. Once it reaches Juvenile however, it will stop randomly attacking and can be ordered like every other baby.
Whenever the baby attacks an entity, a portion of its food will be lost.
Royal Griffin
| This section is about a feature exclusively available on Mobile |
Baby Griffins prefer to be secure to feel safe. While it feels insecure, it will refuse to eat food from inventory or trough. For it to feel secure, it must be close to its mother based on the current ancestor, or a female griffin with the same surname as the baby.
Beelzebufo
Until adulthood maturity, Beelzebufo babies must always be kept inside water. Any attempt to pull it out even as Adolescent will easily kill it.
Food Values
Carnivores will only eat meat, while herbivores will only eat berries. During the baby phase, you have to hand feed the baby until it reaches the juvenile phase. This can take quite a long time so be prepared and have time to sit around feeding a baby.
| Food | Food-Value |
|---|---|
| Preferred |
80 (53.33*) |
| 90 | |
| Other |
60 |
| 50** | |
| 50*** | |
| 50 | |
| 40 | |
| 30 | |
| 25 | |
| 25 | |
| 20 | |
| 12 |
* Brontos only gain 53.33 food points from their preferred ![]() Kibble (Carbonemys Egg)
Kibble (Carbonemys Egg)
** some creatures have different values for raw meat, e.g. the ![]() Bloodstalker gains only 10 for each raw meat.
Bloodstalker gains only 10 for each raw meat.
*** only for ![]() Scorpions,
Scorpions, ![]() Vultures and
Vultures and ![]() Mantis.
Mantis.
Maturation Phases & Food Consumption
| Maturation Progress | Phase |
|---|---|
| 0%-10% | Baby |
| 10%-50% | Juvenile |
| 50%-100% | Adolescent |
Food consumption by babies is very large and varies by the maturation progress dynamically by the following formula:
FoodPerSec = R * (1 - maturationRatio) , with R = basic food drain rate
The basic food drain rate varies per creature. For example, this value for a Rex baby is around R=1.16, while the Bloodstalker has a base food drain rate of R=0.785 (further measurements needed for other creatures).
The Rock Drake has a basic food drain of R = 0.1, other special creatures like Wyvern and Magmasaur may have an equivalent food consumption (not tested yet).
Note: This formula is an estimation and may not give exact numbers (the error is around 5%). `maturationRatio` is the maturation percentage divided by 100.
Some Perspective: For only one baby Rex (remember you could have twins or triplets) on an unmodified server, it will take roughly 96 stacks of raw meat (stack size 40) to reach adult phase, so be sure to have plenty on hand before the baby is born!
Use a calculator to determine the needed food and time, e.g.[3]
Notes
- Each creature seems to have a different food consumption rate that appears to change with each stage of the maturation progress (at least for wolves and Dodos).
Imprinting
Imprinting is a way to improve the stat-values of a bred creature. It requires one of three interactions (giving specific kibble, cuddling or walking) every 8* hours. Only a single player can imprint a newborn baby (whoever claims it first). There is no penalty for not imprinting, but no gain either. Any imprinting done is permanent. Accumulated imprinting values will not be lost if you miss an imprint.
If this player manages to care for the baby during the entire maturation, the creature's base stats before modifications will be increased by 20% and, when ridden by the imprinter, it will also gain 30% increased damage and damage resistance.
* The time between imprint and the amount of imprint gained per imprint can change if an event is happening. Keep an eye out on the HUD for when the next imprint is required.
Sterile Creatures
All tameable creatures are breedable except for:
- Astrocetus
- Basilisk
- Coelacanth
- Desert Titan
- DodoRex
- Dung Beetle
- Forest Titan
- Giant Bee
- Giant Queen Bee
- Griffin
- Ice Titan
- Karkinos
- Lamprey
- Leech
- Liopleurodon
- Mega Mek
- Mek
- Noctis
- Noglin
- Phoenix
- Piranha
- Rare X-Sabertooth Salmon
- Reaper
- Rock Elemental
- Sabertooth Salmon
- Titanoboa
- Titanosaur
- Trilobite
- Zombie Wyvern
- Zomdodo
Despite in-game showing the ![]() Reaper King as breedable, it is impossible due to how they are "tamed", with the added fact they are shown as genderless.
Reaper King as breedable, it is impossible due to how they are "tamed", with the added fact they are shown as genderless.
In ARK: Survival Evolved Mobile, ![]() Royal Griffin has gender and can be bred. However, they will only mate with members of the same house (they must have the same 2-3 last letters in their names).
Royal Griffin has gender and can be bred. However, they will only mate with members of the same house (they must have the same 2-3 last letters in their names).
Times for Breeding
Template:Table of Breeding Template:Table of Mammal Breeding
Stats of the Offspring
The spawn of two dinosaurs will inherit the "natural" stat levels of its parents. Natural stat levels are the levels in each stat after it has been tamed but before it gains any stats through leveling-up by a player. There is a 55% chance of inheriting the stronger stat of each parent. This means you have a certain percent chance of obtaining a 100% perfect (meaning with only the higher stats of both parents) creature from both parents from each mating.
The stat-values (not the stat-levels) of the offspring are calculated like for a creature that was just tamed with a 100% taming effectiveness with the taming effectiveness bonuses applied. This means that an offspring can have higher values than its parents in stats that get a bonus from taming effectiveness (for most creatures this is Melee Damage and sometimes Food). See also Creature stats calculation for how the values are calculated from the stats.
Example
To understand this better, here is an example. Let's only look at the melee damage of a pair of Raptors. Assume they were just tamed with a taming effectiveness of 70% and both already have 4 levels in melee damage. The value you can see as melee damage is according to the formula on Creature stats calculation, the newly added extra modifier (balancing update), and the stats of the raptors
Value = (BaseStat × ( 1 + LevelWild × IncreaseWild) + TamingBonusAdd × TamingBonusAddModifier) × (1 + TamingEffectiveness × TamingBonusMult × TamingBonusMultModifier)
Value = (100% × ( 1 + 4 × 5%) + 50% × 15%) × (1 + 70% × 40% × 45%)
Value = 127.5% × 112.6%
Value = 143.6%
The offspring inherits the values of its parents. They don't inherit the plain value, but the levels the parents spend in the stats before being leveled up by a player. So the offspring inherits 4 levels for its melee damage (as both parents have 4 levels in this case). To get the value of the melee damage of the offspring, we calculate it like before, but this time we use a taming effectiveness of 100% (this is the way the game gives you another bonus if you breed creatures).
Value = (BaseStat × ( 1 + LevelWild × IncreaseWild) + TamingBonusAdd × TamingBonusAddModifier) × (1 + TamingEffectiveness × TamingBonusMult × TamingBonusMultModifier)
Value = (100% × ( 1 + 4 × 5%) + 50% × 15%) × (1 + 100% × 40% × 45%)
Value = 127.5% × 118%
Value = 150.5%
Like the parents, the offspring has 4 levels in melee damage, but with the higher taming-effectiveness-bonus its value is 150.5% instead of 143.6%. The bonus is not much, but is clearly noticeable.
Amount of higher stats and chance of obtaining them when hatching
| Number of desired stats | Probability [%] |
|---|---|
| 6 | 2.77% |
| 5 | 13.59% |
| 4 | 27.80% |
| 3 | 30.32% |
| 2 | 18.61% |
| 1 | 6.09% |
| 0 | 0.83% |
Finding the Best Parents
To maximize the stats of the offspring, specialized parents with a good value in few stats are needed. The more specialized a creature is in one stat, the higher it can be. To get a really good breed you need 6 creatures, each with a high upleveled (only the wild-leveling counts here) different stat. After at least 3 generations a creature with the best of the stats can be bred.
Wild Stats Level-up
Type in values of a wild creature to see on which stats it's emphasized. Green values on a high-level creature are very good for breeding. If you have already tamed your creature you can try to recover the breeding stats with an external tool.[4]
The stat-calculator does not work in the mobile-view, see here for alternatives: Apps
Note that after the creature is tamed it gets bonuses on some stats depending on the taming effectiveness. This makes it hard to retrieve the levels on a tamed creature, so this tool is only for wild ones, but gives a first impression, how well the stats are distributed.
Level of the Offspring
The resulting level of the baby is the sum of wild level-points (i.e. level of the creature directly after taming) spent in the inherited stats by its parents. Assume for example, that one (highly unusual) parent has only leveled up in Health 40 levels and nothing else, while the other parent leveled up only in weight 30 levels. If the baby happens to inherit these higher stats, it inherits 70 levelups giving it level 71 with its starting level. Other possibilities are a level 41 Baby with only health leveled up, a level 31 baby with only weight leveled up or a baby with level 1 and nothing leveled up.
The (practically impossible to reach) maximum of levels a baby can get would be 223 levelups (149 natural + 74 by taming bonus (TE of nearly 100%)) in each stat, with 7 stats summing up to level 1562 (223 levelups in 7 stats plus the startinglevel: 223 x 7 + 1 = 1562).
One would need to find an average of 2.863×10^188 number of any creature to get all 223 wild stats put into any specific stat, assuming all levels have the same chance of spawning [1/((1/7)^223)].
Note that the levels a wild animal wastes in the movement stat is remembered and passed on during breeding. Thus two siblings with seemingly identical stats might have different levels if one of them inherited a higher movement stat than the other. This has one practical advantage: a higher torpor level.
Note that the cap level of creature on official are 450, after this level your creature will be deleted by server restart, transferring or if you cryo pod it.
Example
Here's an example of two parents and possible children they can get. Child1 inherited random stats, ChildMax only got the maximum values and ChildMin only got the lower values. You can see that the level of the offspring can be lower, in between or higher as the levels of the parents. The higher levelup is displayed in bold.
Displayed are only the wild levels (the ones that can be inherited). Levelups by the player have no influence on the stats of the offspring.
In this example the levels of Stamina are the same for both parents, so you cannot tell which one the offspring inherited.
| Mother | Child1 | ChildMax | ChildMin | Father | ||||||||||||||||||||||||||||||||||||||||||||||||||||||||||||||||||||||||||||||||
|---|---|---|---|---|---|---|---|---|---|---|---|---|---|---|---|---|---|---|---|---|---|---|---|---|---|---|---|---|---|---|---|---|---|---|---|---|---|---|---|---|---|---|---|---|---|---|---|---|---|---|---|---|---|---|---|---|---|---|---|---|---|---|---|---|---|---|---|---|---|---|---|---|---|---|---|---|---|---|---|---|---|---|---|---|
Level 154
|
Level 150
|
Level 166
|
Level 130
|
Level 142
|
To get to the creature's level, you add up the levels of the stats and add one, as all creatures start at level one.
Notes/Trivia
- Contrary to popular myths, the Oviraptors and Unicorns do not increase chances for twins, triplets nor mutations.
- The Titanoboa, Basilisk, Coelacanth, Piranha, Sabertooth Salmon, Karkinos, Dung Beetle, Astrocetus, Lamprey and Trilobite cannot be bred when domesticated.
- However, in the real world all reptiles, fish, crustaceans, snails, whales, and Trilobites and Dung Beetles are able to breed.